A first-hour Deskrawl checklist from the 1.0 build: life skills to buy, talents to skip, the carriage filter, and what the game automates for you.
Deskrawl Beginner Guide: What to Unlock in Your First Hour
Most first-hour Deskrawl advice is "buy everything you can afford." The 1.0 launch build actually ships an 85-node Life Skill tree, a 70-map campaign line and 185 talents — and exactly eight life skill nodes are worth your first 3,400 gold. Spend the first 650 gold opening the four starter branches of the tree, then 1,500 more on the Equipment Auto-Sell node, then push the world map one zone at a time.
Two things quietly eat a new player's first hour: hunting for an "Equipment Auto-Filter" life skill that does not exist as a node in the 1.0 build, and spending gold on sockets and runes that are hard-locked until level 30 and level 40 respectively. This guide is the order of operations: what to buy, at what price, in what sequence; what to leave alone for weeks; and which numbers in this game are worth your time in hour one.
Three rules decide your first hour:
- Buy the four cheap branches first. They cost 650 gold together and they are what makes every other node in the tree purchasable.
- Automation beats stats. Gear you never pick up costs zero carriage space, and carriage space is the real bottleneck early.
- Clear forward, never grind. The gate is the next map, not the next level.
Here is the hour-one checklist, in the order you should run it:
- Buy, in this order, at node price: tree root (50g) → Gold Find I, Item Find I, XP Gain I, Revive Cooldown Reduction I (150g each) → Auto Refill (500g) → Expedition Camp (750g) → Equipment Auto-Sell (1,500g). Those eight nodes cost 3,400 gold in total: 50 + 4 × 150 + 500 + 750 + 1,500. Every price here is the game's own listed cost for that node, and the order is legal because each node's requirement is already bought earlier in the list. For you: spend in exactly this order and nothing in hour one is wasted.
- Do not buy yet: a storage page (20,700g from zero) or an auto-salvage node (50,700g from zero) — each costs more than that whole route combined. For you: skip both until the tree around them is finished.
- Do not even look at: gem sockets (level 30), rune drops (level 40), Nightmare difficulty. For you: these are not decisions yet, they are calendar dates.
- Progress by clearing, not grinding: the world map is one unbranching chain of 70 maps.
The Four 150-Gold Nodes That Gate the Whole Tree
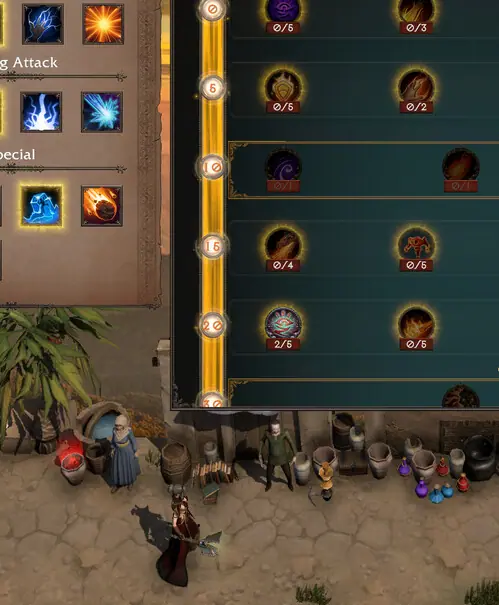
The Life Skill tree is not a grid you fill in any order. It is 85 nodes wired as a real tree: 84 of the 85 need another node bought first, every node is a one-time purchase with no levels to stack, and each carries a single flat price instead of a per-level cost. There is no respec — you buy a node once and it stays bought. What that means for you: an early purchase is permanent, so buy the four branches below first and never reopen them.
Only four nodes hang directly off the root, and the price, the real cost and the running total are three different numbers — do not mix them:
| Branch | What the game calls it | What it gives you | Node price | Cost to own this one alone | Running total, all four |
|---|---|---|---|---|---|
| Tree root | Auto Recovery | Full health on returning to town | 50 | 50 | 50 |
| Branch A | Gold Find I | Flat +0.1029 Gold Find (shown as a percentage, so it reads as 10%) | 150 | 200 | 200 |
| Branch B | Item Find I | Flat +0.1211 Magic Find (≈12%) | 150 | 200 | 350 |
| Branch C | Revive Cooldown Reduction I | −1.6s off the revive timer (the game stores 1.5647 and rounds it to one decimal, with an s) | 150 | 200 | 500 |
| Branch D | XP Gain I | Flat +0.0995 XP Gain (≈10%) | 150 | 200 | 650 |
All four hang off the same parent — the root — with no node between them. So each costs 200 gold to own outright (50 for the root, plus its own 150), and 650 only exists once you have bought all four. That is the highest-value spend in your first hour: it makes every later node purchasable, and each branch then grows independently. For you: 650 gold buys the four branches, and 3,400 buys the entire first-hour route.
The tier-two nodes cost 8,000–25,000 gold each, versus 150 gold for the tier-one node on the same branch. They are not strictly upgrades of tier one — Material Find I is +0.4631 while Material Find II is +0.2588, because the two sit on different branches rather than one feeding the other. For you: a bigger Roman numeral in the name is not a bigger number in the effect, and nothing above the first tier is affordable in hour one anyway. The full node-by-node tree is here.
Auto-Sell Is the First Real Purchase, Auto-Fill Is the Second
Once the four branches are open, the next buys in rough order of return. The last column is the game's own node description, quoted word for word from what the game shows you, so you can check the wording in-game:
| Purchase | Node price | Cost from zero, cheapest route | What the node does |
|---|---|---|---|
| Auto Refill | 500 | 700 | "Automatically refill potion charges after returning to town or being revived from death." |
| Capacity I | 500 | 700 | "Increase Carriage Capacity by {value}" — a flat +1.549 of carriage capacity |
| Expedition Camp | 750 | 950 | "Gold and experience accumulate based on the highest area you have unlocked, and are collected the next time you enter town." |
| Soul Reliquary I | 1,000 | 1,200 | "Increase Soul Shard carry limit by {value}" — a flat +100 |
| Equipment Auto-Sell | 1,500 | 1,700 | "automatically sells equipment of the selected rarities the moment the carriage picks it up" — "Sold equipment does not take up carriage space." |
| Combat Potion Auto-Use Slot | 2,500 | 2,700 | "Unlock a slot for a combat potion, which is used automatically during combat whenever its buff is not active." |
| Auto-Fill Inventory | 6,000 | 7,700 | "When the Carriage is full, newly collected loot is sent to your inventory when space is available." |
"Cost from zero" counts the root plus any prerequisite nodes you would have to buy to reach the target — which is why Auto-Sell reads 1,700 there and 1,500 in the opening line. Note what Expedition Camp actually says: offline gold and XP accrue from the highest area you have unlocked, not the zone you left your character standing in. For you: park the carriage in a starter zone before going offline and Expedition Camp still pays out at your best-cleared zone.
Auto-Sell is the one to buy first, and the in-game hint is explicit about why: "Auto-Sell turns gear into gold and Auto-Salvage breaks it down into materials the moment the carriage picks it up, even during combat. Neither takes up carriage space." Gear you never pick up costs zero carriage space, and carriage space is the real bottleneck early — normal enemies drop nothing at all 87.4%–95% of the time. For you: buy Auto-Sell before you buy anything that adds capacity, because the cheapest fix for a full carriage is gear that never enters it.
A long-running Steam thread titled "Bug Report - Auto Fill inventory not working" was opened on June 30, before launch. The original poster bought the node, ran the game idle overnight, and found a full carriage and an empty inventory. Four more players agreed through September 22. Then three players reported it working on September 26, 27 and 28 — with one adding that it "picked up everything no matter the filter settings." That last remark points at the same gap the next section describes, but it is a single forum post, not a confirmed bug.
The Carriage Filter Exists — the Node to Unlock It Does Not
The carriage filter panel is free and always open. Its label is Equipment Filter, and it sets one action per rarity: Pick Up, Auto-Sell or Auto-Salvage. The hint text ends with "Learn Life Skills to unlock new filter actions" — Pick Up is your baseline, and the other two actions are the gated ones. For you: set all three rarities from minute one, before your first long offline run.
The game ships exactly six automatic features behind life skills, and each one is attached to a node:
| Number | What it unlocks | Node that grants it |
|---|---|---|
| 0 | Full heal when you return to town | Tree root (50g) |
| 1 | Potions refill when you return to town or revive | Auto Refill (500g) |
| 3 | Overflow loot moves to your inventory | Auto-Fill Inventory (6,000g) |
| 4 | Gear sells itself on pickup | Equipment Auto-Sell (1,500g) |
| 5 | Offline gold and XP | Expedition Camp (750g) |
| 6 | Gear breaks down into materials on pickup | Equipment Auto-Salvage (35,000g) |
That is the whole list: six features, numbered 0, 1, 3, 4, 5 and 6, with nothing on 2. The filter's own name — Equipment Auto-Filter, described in the game as "Enable Carriage Equipment Auto-Filter, so that it can collect equipment matching the selected rarities and leaves the rest on the ground" — is text the game ships alongside 36 other life-skill names, with nothing behind it in the 1.0 build: no node, no effect, no unlock condition anywhere. Of the 37 life skill names the game ships text for, 36 have a working effect behind them, and only 35 are attached to a node you can buy at all. For you: do not hunt for a node that grants it, it does not exist. If a build guide promises a carriage auto-filter purchase, that guide is wrong.
One player's "picked up everything no matter the filter settings" is consistent with the same gap, but it is a single forum post, not a confirmed bug. Your practical rule: trust what you can see in the panel, and check your carriage contents after the first night away.
Clear the Map, Don't Grind the Level
Zone progression is a hard single line. Every combat map in the chain requires exactly one earlier map cleared — Forest map 1 is the only one with no requirement at all — and walking it from the start produces an unbroken 70-map chain with no forks, from Forest map 1 to Volcano map 7. The only three branch points lead off the line, to the Dreamy treasure zones.
| # | Region | Maps | Enemy level band | Gate on the last map |
|---|---|---|---|---|
| 1 | Kings Woods | 7 | 1–10 | Demon Skull |
| 2 | Spire Hill Crypt | 4 | 11–16 | — |
| 3 | Spire Hill Crypt Lower | 3 | 17–19 | Demon Skull |
| 4 | Kings Woods South | 7 | 20–28 | Demon Skull |
| 5 | Tazan Wastes | 7 | 28–34 | Demon Skull |
| 6 | Tazan Isles | 7 | 34–40 | Demon Skull |
| 7 | The Barrens | 7 | 40–46 | Demon Skull |
| 8 | The Crimson Vale | 7 | 46–52 | Demon Skull |
| 9 | Veldak Highlands | 7 | 52–58 | Demon Skull |
| 10 | The Defiled Keep | 7 | 58–64 | Demon Skull |
| 11 | The Cinder Crown | 7 | 65–70 | Demon Skull |
Exactly 14 of the 82 maps carry an entry requirement on top of the previous map: the ten finales above, the Mythic Rift, and the three Dreamy zones. Each finale asks for one Demon Skull, with a difficulty-matched variant — one for Normal, a Nightmare version on Nightmare, an Inferno version on Inferno 1. Nine regions have exactly seven maps; the Spire Hill Crypt is the exception, split 4 + 3. For you: every zone ends the same way, so learn the skull rule once and you have cleared the campaign's entire gate system.
Because the bands run 1 to 70 without a gap and the door is the map rather than the level, sitting in zone one grinding past level 10 buys you nothing you can walk through yet. For you: if you are stuck with nothing to do, the answer is the next map, not another hour in the same zone. The full zone-by-zone level order is here, and the skull rules are in the Demon Skull entry guide.
Talents Are Free to Experiment, and Capstones Are Cheaper to Swap Than You Think
The talent system is the opposite of the life skill tree. All 185 talents have no prerequisite — there is no talent prerequisite tree at all. Unlocking is purely a level check, and points go into slots that run from 1 up to 10. Nothing you pick can lock you out of anything else. For you: experiment freely in the first hour instead of hoarding points for a perfect plan that does not exist.
The only real restriction is the choice between capstones, and it is narrower than it sounds. There are exactly three layers, gated at three exact levels:
| Capstone layer | Unlocks at | Talents in it | Points per talent |
|---|---|---|---|
| Layer 1 (level-10 layer) | level 10 | 13 | 1 |
| Layer 2 (level-30 layer) | level 30 | 12 | 1 |
| Layer 3 (level-60 layer) | level 60 | 16 | 1 |
Swapping a capstone costs 8 gold per point spent, and since every capstone is a single-point talent, swapping one costs exactly 8 gold. The UI describes the flow as "Left-click to replace {0} for {1} gold. Allocated points transfer to this talent; excess points are refunded," and the rule as "Choose one capstone per layer. Choices in other layers are independent." For you: a capstone you regret costs 8 gold to fix, which is less than a single potion — so take the one you want now.
The one hard stop is a dependency lock, not gold: the game refuses a swap with "Cannot replace this capstone while other talent requirements depend on the current allocation." For you: read what a capstone feeds before you confirm it, because the lock only clears after you unspend those points.
That is inside your first session, and 8 gold makes it reversible. What is worth waiting on is the layers at 30 and 60: the level requirement on the talent table runs to 100, past the game's own level cap of 70, so the tree keeps taking points long after you stop levelling. For you: spend layer one freely, and judge layers two and three against what you have actually cleared by then.
Gold You Should Not Spend Yet
Three things look affordable and are not, because of hard level gates in the game:
- Gem sockets require item level 30, and only six of the eleven slots can hold them at all — see the gems and sockets guide.
- Runes start dropping at level 40, with the first rune slot unlocking at 40 as well.
- A second storage page costs 20,700 gold from zero, and each of the 5 pages holds 50.
For you: in hour one the only gold that compounds is the 3,400 gold route above — everything on this list is a week-two problem at the earliest.
Difficulty is gated too, and not by level: the unlock hint reads "Clear the final boss on {0} to unlock," and difficulties can only be switched inside town. Nightmare is not a first-hour decision. The offline earnings guide covers the AFK side — the 8-hour base cap plus two +2-hour nodes and one +4-hour node tops out at 16.
Equipment Upgrades Are Free Through +4
One last freebie while you are low level. The game's upgrade table ships ten rows, one for each step from +1 to +10:
| Upgrade | +1 | +2 | +3 | +4 | +5 | +6 | +7 | +8 | +9 | +10 |
|---|---|---|---|---|---|---|---|---|---|---|
| Chance | 100% | 100% | 100% | 100% | 75% | 50% | 40% | 30% | 20% | 10% |
The first four are guaranteed. Take every cheap drop to +4 in your first hour without thinking about it — the odds only start moving against you at +5, and the full table is on the upgrade chance page.
FAQ
Should I pick a specific class in my first hour? Not here, and not anywhere yet: the game launched on 2026-09-28 and there is no reliable meta three days in. All four classes share one ability ladder — abilities unlock at levels 1, 5, 10 and 15 in five-level steps, and you have four ability slots — so the class gates nothing in hour one. Pick what you like, and read the difficulty guide when a final boss is in sight.
Do I need to buy the carriage filter first, before anything else? No, and you cannot. There is no filter node to buy in the 1.0 build. The filter panel itself is free and lets you set Pick Up, Auto-Sell or Auto-Salvage per rarity from the start; what costs gold is unlocking the Auto-Sell and Auto-Salvage actions inside it.
Is the Auto-Fill Inventory node broken? Community reports are split, and the oldest ones are from the pre-launch build — see the callout above for the full timeline. If your carriage genuinely fills and your inventory stays empty, check first that the carriage really is at capacity rather than simply holding everything it picked up.
Should I level to 10 before buying anything? No. The four 150-gold nodes and their 50-gold root are what unlock the rest of the tree, and you want them bought before your carriage fills rather than after. Everything beyond Auto-Fill Inventory can wait.
What about the minions that pull the carriage? Worth grabbing as they appear, because carriage capacity is the real constraint early. But capacity nodes are separate purchases from the automation nodes, and the numbers are on the minions and carriage capacity page.
Related Guides
- Deskrawl Life Skills Tree: all 85 nodes and where Gold Find actually sits
- Deskrawl Zones and Level Order: the 70-map chain with a level band for every map
- Deskrawl Talents: why there are no prerequisites and what each capstone layer costs
- Deskrawl Offline Earnings: the 8-hour cap and the nodes that take it to 16
- Is Deskrawl Worth It: whether to spend the first hour at all
Official source: every number on this page comes from the game's own shipped data in the 1.0 launch build (2026-09-28, 28 September 2026); the live client moved to patch 1.0.0g on 2026-09-29, so a figure may have drifted by one patch. See Deskrawl: Idle ARPG on Steam and the 1.0 launch announcement. Player reports quoted here come from the Auto-Fill bug thread on Steam Discussions, a community source, not an official statement.
More Deskrawl: Idle ARPG Guides
The 1.0 release raised the cap from 35 to 70, expanded the talent tree, reworked Life Skills and added a Paragon tab. Demo saves are wiped.
Demon Skulls are the only entry currency, and the rule is odd: entry only checks your balance, and the skull is deducted after you clear the stage.
Deskrawl has exactly three difficulties. Inferno multiplies enemy HP sixfold and is the only tier that drops Divine gear, rune sets and Mythic content.
The real Deskrawl loot table from the 1.0 build — 87-95% no-drop rolls on trash mobs, chest contents, and what patch 1.0.0g actually changed.
The verified Deskrawl +10 upgrade table: four guaranteed levels, then 75%, 50%, 40%, 30%, 20% and 10% — plus the material each slot needs.
Locates the final boss, lists entry needs and gives a clear plan to beat him without wasted runs.
All three Deskrawl fishing lakes, all 12 catches in each, the 50 percent empty rate, and the one Rein that only comes out of water.
The 68 official Deskrawl stat affixes and the per-slot roll pools, plus the 11-vs-12 equipment slot puzzle solved: rings occupy two slots.